Understanding how to buy a toll-free number can be critical for your business operations. This guide provides a straightforward walkthrough on purchasing a toll-free number for your subaccounts. Equip yourself with this knowledge to enhance your customer communications strategy.
How to Buy a Toll-Free Number?
- Go to Settings > Phone Numbers
- Click Add Number and select Add Number
Note: You are limited to only 1 number if you complete the A2P Registration Process as a Sole Proprietor
If you complete the A2P Registration Process using an EIN, there is no limit on how many numbers you can buy. We do recommend purchasing at least 1-2 to start


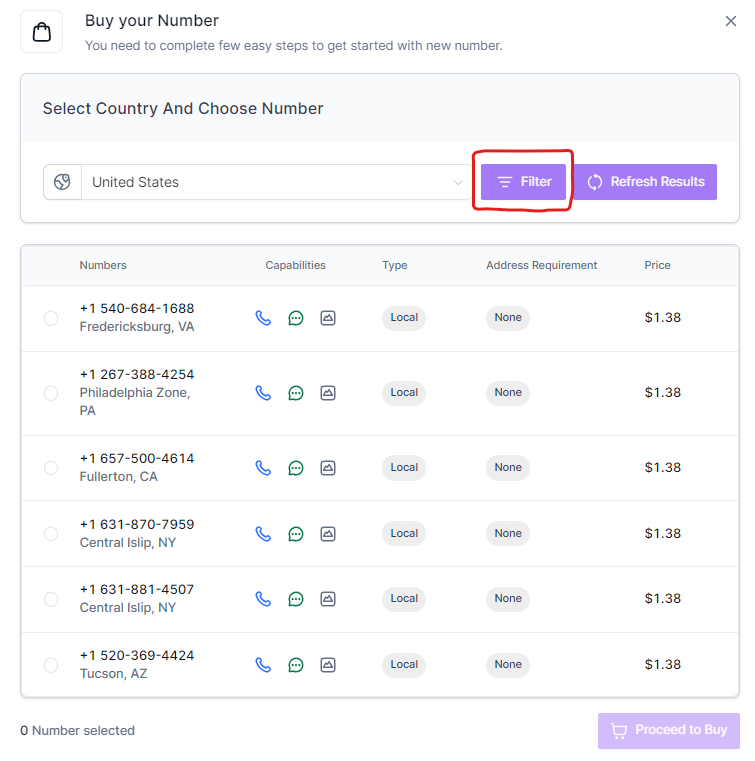
Search for numbers by digit (area code) and choose "First part of the number" then Apply.
This will give you a list of numbers to choose from. (if you don't pick "First part of number" you will get a list containing the 3 digits you enter anywhere is the number) You will only be able to purchase numbers 1 at a time.
Each local number is $1.38 a month. Toll-free numbers are $2.58 a month.
Toll-free numbers are numbers that begin with one of the following three-digit codes:
800, 888, 877, 866, 855, 844 or 833

Click the box next to the number you want to purchase then click Proceed to buy

- To Configure your new number, click the pencil icon (this will bring up a new pop up)


- 1. Number Name - The system will default to the phone number but you can rename it
- 2. Forward Calls to - You can forward calls to your cell, Google Voice, etc.
- 3. Pass Called number to Caller ID - By default, the system transmits the number of the caller. However, if you prefer the caller ID to show the number that the caller dialed instead, you can activate this feature.
- 4. Enable Call Connect Feature - To ensure more accurate call reporting, this feature mandates the receiver to press a key to establish the connection for the call.
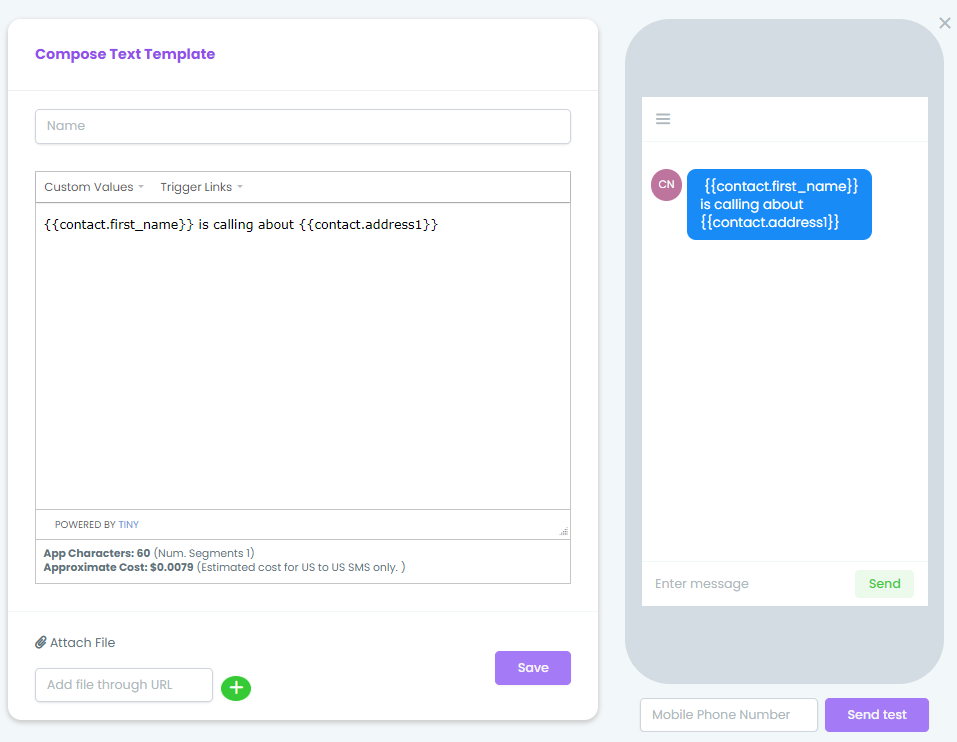
- 5. Whisper Message - The Whisper message allows you to hear a message while the phone is ringing on the caller's end. For example, you can create a message that says "Contact first name is calling about contact address" {{contact.first_name}} is calling about {{contact.address1}} or
A new call from Marketingplex with the caller's name. {{contact.name}} is calling from Marketingplex
You can put any type of message, it doesn't have to have a caller's name in it.
(Tool: Use the 'Templates editor to create your message (don't save it), then copy and paste it into the 'Whisper Message field)
Marketing > Templates > Add Template (Snippet) > Add Text Template (Snippet). You can use the custom values to add any information you want to hear. The custom values will automatically pull the information from the contact and you can use multiple custom values. Copy the text (highlight then click Control and C at the same time to copy. You don't need to save this template. Go back to settings > Phone Numbers > Click the 3 dots on the far right of the number, > Edit Configuration > Whisper Message > Click Control and V at the same time to paste the new whisper message

Configure number

Add Whisper Message

6. Call Recording - If you would like to have all of your outgoing/incoming calls recorded check the box. Click inside of the large and click the space bar. This is to remove "This call will be recorded for quality purposes". The caller won't hear that message and your calls will still be recorded. This way you can go back and relisten to the conversation, take additional notes, or listen to how your VA is doing.
- INCOMING / OUTGOING TIMEOUT - WE SET OUR TO 60 BUT YOU CAN SET THAT TO YOUR PREFERENCE

7. Incoming Call Timeout - If you don't want to use the Call Connect feature, you can adjust the Incoming Call timeout"
according to how soon the forwarding number's voicemail answers. If you don't have your calls forwarded, you can have the system send the contact a Missed Call SMS (see automation >workflows or there is also a feature in settings). We set our timeout to 60 seconds but you can make it anything for example 15, 20,30, 45 etc.
8. Outgoing Timeout - We set our timeout to 60 seconds but you can make it anything for example 15, 20,30, 45 etc.
9. Ring Incoming Call to all Users - Calls will be forwarded to the user's selected channel web app or mobile app. If both are selected in user settings then only the web app will ring
Was this article helpful?
That’s Great!
Thank you for your feedback
Sorry! We couldn't be helpful
Thank you for your feedback
Feedback sent
We appreciate your effort and will try to fix the article